Want to share your content on python-bloggers? click here.
In the era of AI, image classification has become an essential tool for a wide range of industries. Whether it’s for identifying objects in photographs or analyzing complex visual data, pretrained AI models can simplify the process and deliver accurate results. In this post, we’ll explore how to classify images using two popular methods—one utilizing Keras with the InceptionV3 model and the other employing Python with the VGG19 model. Through detailed examples, you’ll learn how to prepare your image data and execute the classification process using these powerful tools.
Image Classification Using Keras Node
To perform this classification, we’ll be using InceptionV3 (https://arxiv.org/abs/1512.00567) from Google.

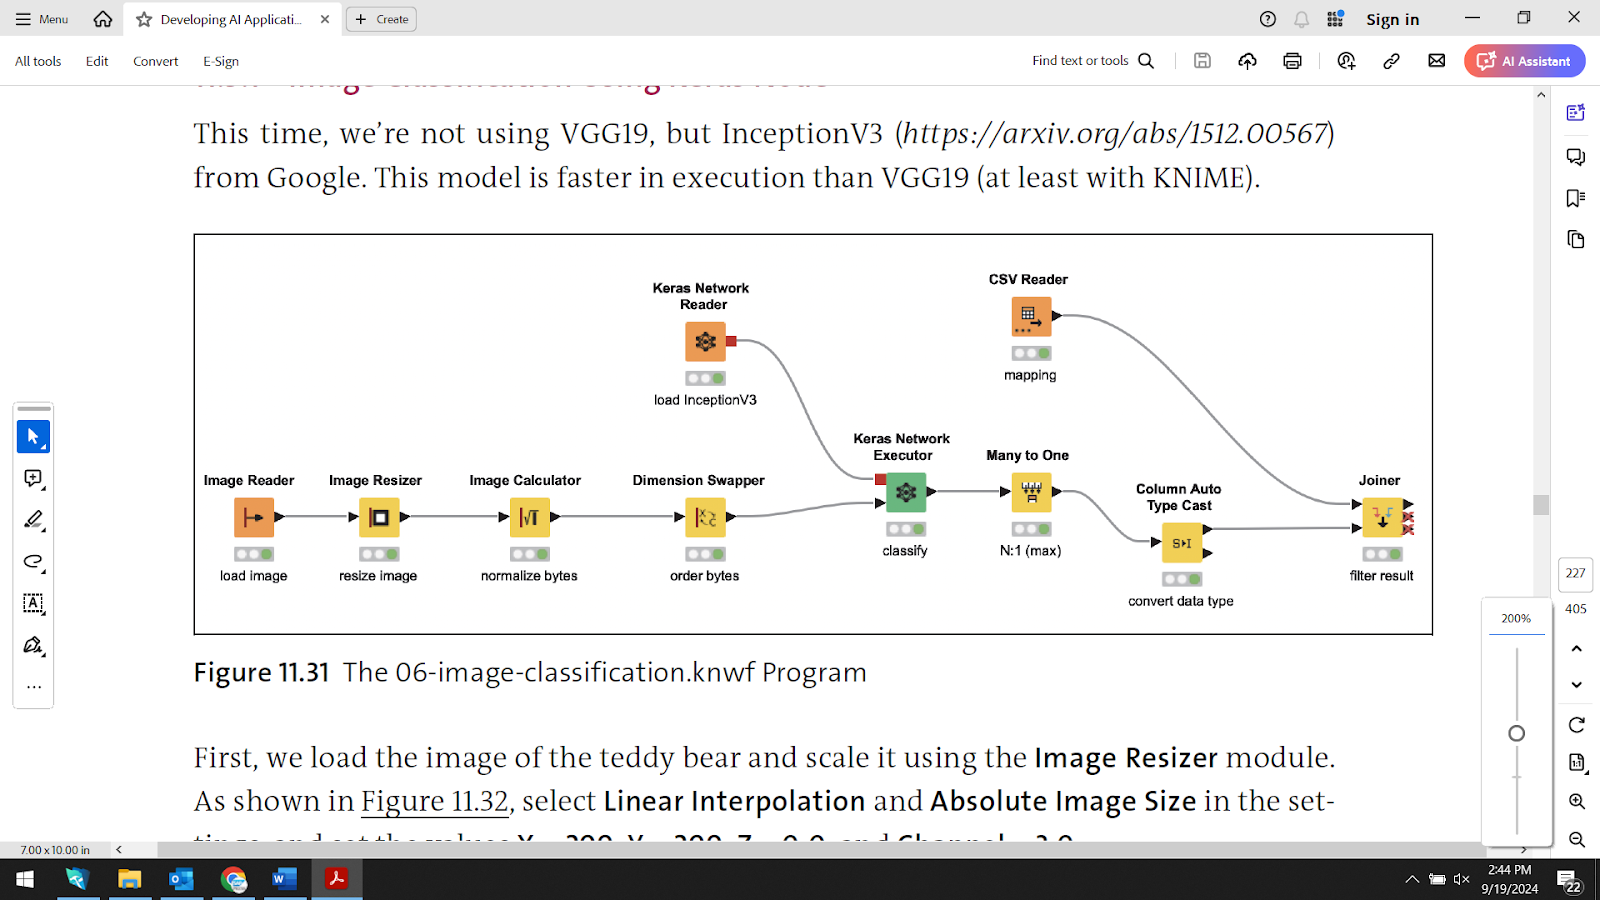
The 06-image-classification.knwf Program
First, let’s go ahead and load the image of the teddy bear and scale it using the Image Resizer module. As shown in the figure below, you’ll select Linear Interpolation and Absolute Image Size in the settings, and set the values X = 299, Y = 299, Z = 0.0, and Channel = 3.0.
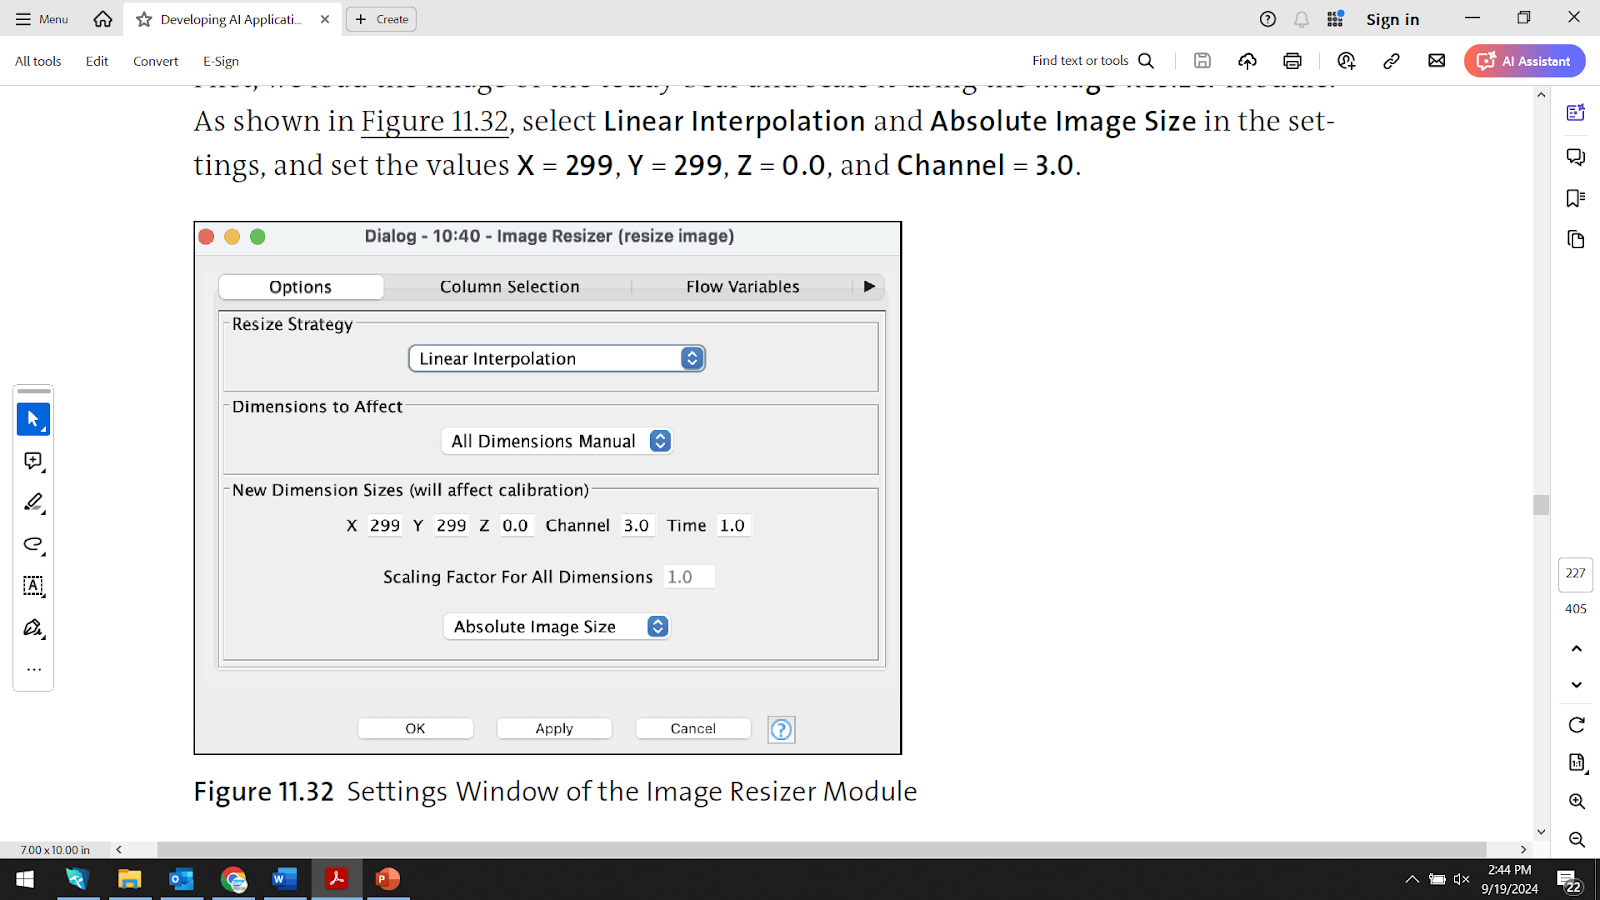
Settings Window of the Image Resizer Module
The model later expects the images in the size of 299 × 299 pixels and 3 bytes for RGB. The next two modules also process the image data so that the model can work with it. Under the Column Selection option, you can set that the existing image should be overwritten (and no new table gets created).
The Image Calculator module standardizes the pixel values for InceptionV3 between -1 and +1. You would write it like this:
(($Image$/255)-0.5)*2
The existing image is also replaced at this point, as the original image is no longer required in the rest of the process.
The Dimension Swapper module reorganizes the image information. The X, Y, Channel sequence results in Channel, X, Y. This is also an adaptation to the model used.

Settings Window of the Dimension Swapper Module
How do we know that the image data must be scaled as just described and the order of the image information adjusted? You could read the scientific publications or study the Keras source code, of course, but fortunately, other developers have already done this and made their KNIME programs available to the public. You can search for and view programs at the KNIME Community Hub. If the description of a project sounds interesting and you want to test the program, you can simply drag and drop it from the browser into the KNIME workspace. If you’ve never worked with KNIME before, you can learn how to install KNIME by following these instructions.
The Keras Network Reader module loads the H5 file of the model. You only need to set the path to the inception_v3.h5 file, which is located in the data subfolder of the 06 image classification program. You can also access the subfolder via the File Explorer of your operating system.
The image data can now be fed to the Keras Network Executor module (see the next figure). Under Option > Outputs > Conversion, select To Number (double), and leave Output columns prefix empty so that only numerical values are output at the output.
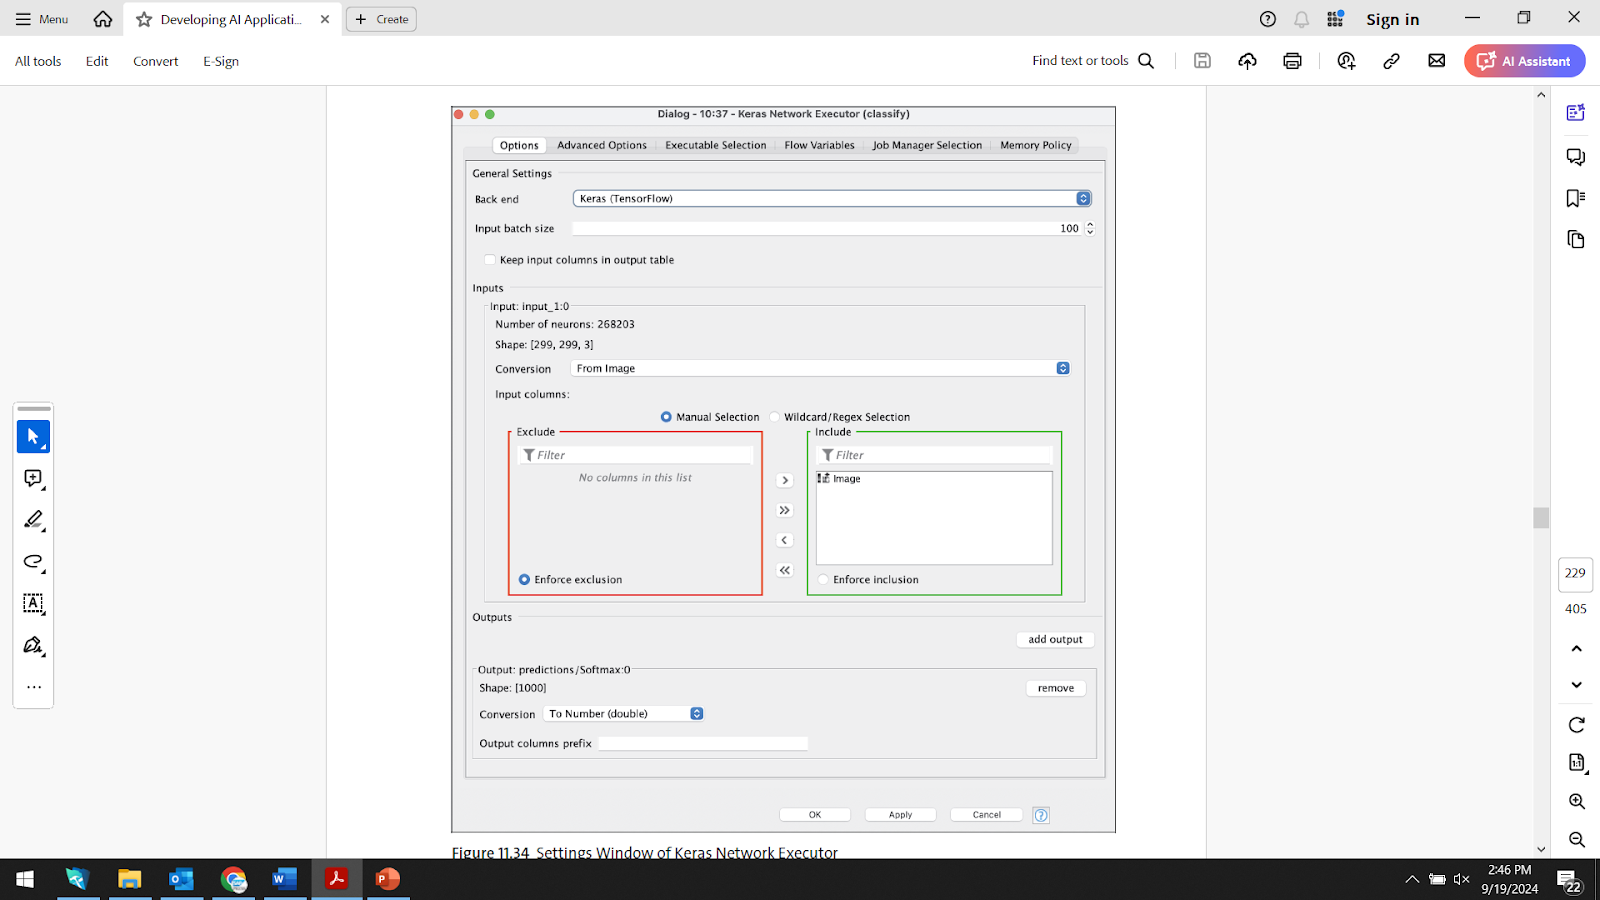
Settings Window of Keras Network Executor
When you execute the program, the Keras Network Executor module outputs 1,000 values containing the corresponding probabilities for the respective classes (formed using the softmax function). Select the module, and check the result in the Node Monitor screen, shown in this figure.
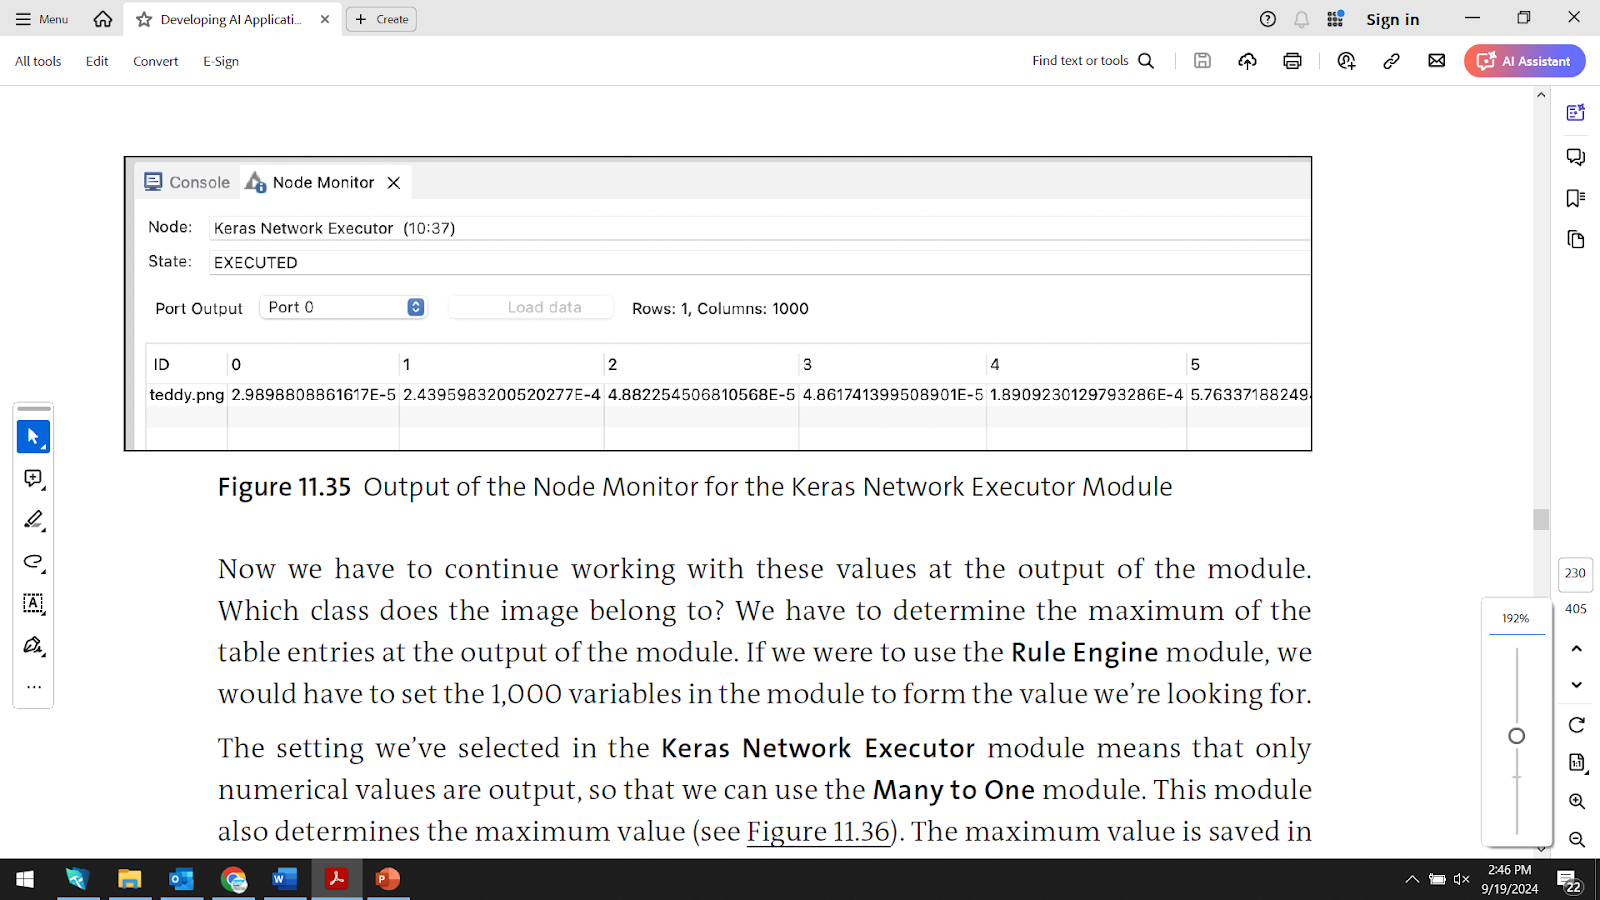
Output of the Node Monitor for the Keras Network Executor Module
Now we have to continue working with these values at the output of the module. Which class does the image belong to? We have to determine the maximum of the table entries at the output of the module. If we were to use the Rule Engine module, we would have to set the 1,000 variables in the module to form the value we’re looking for.
The setting we’ve selected in the Keras Network Executor module means that only numerical values are output, so that we can use the Many to One module. This module also determines the maximum value (as shown in the figure below). The maximum value is saved in the col column. When you execute the module, you’ll see the number 850 at its output (in the Node Monitor).
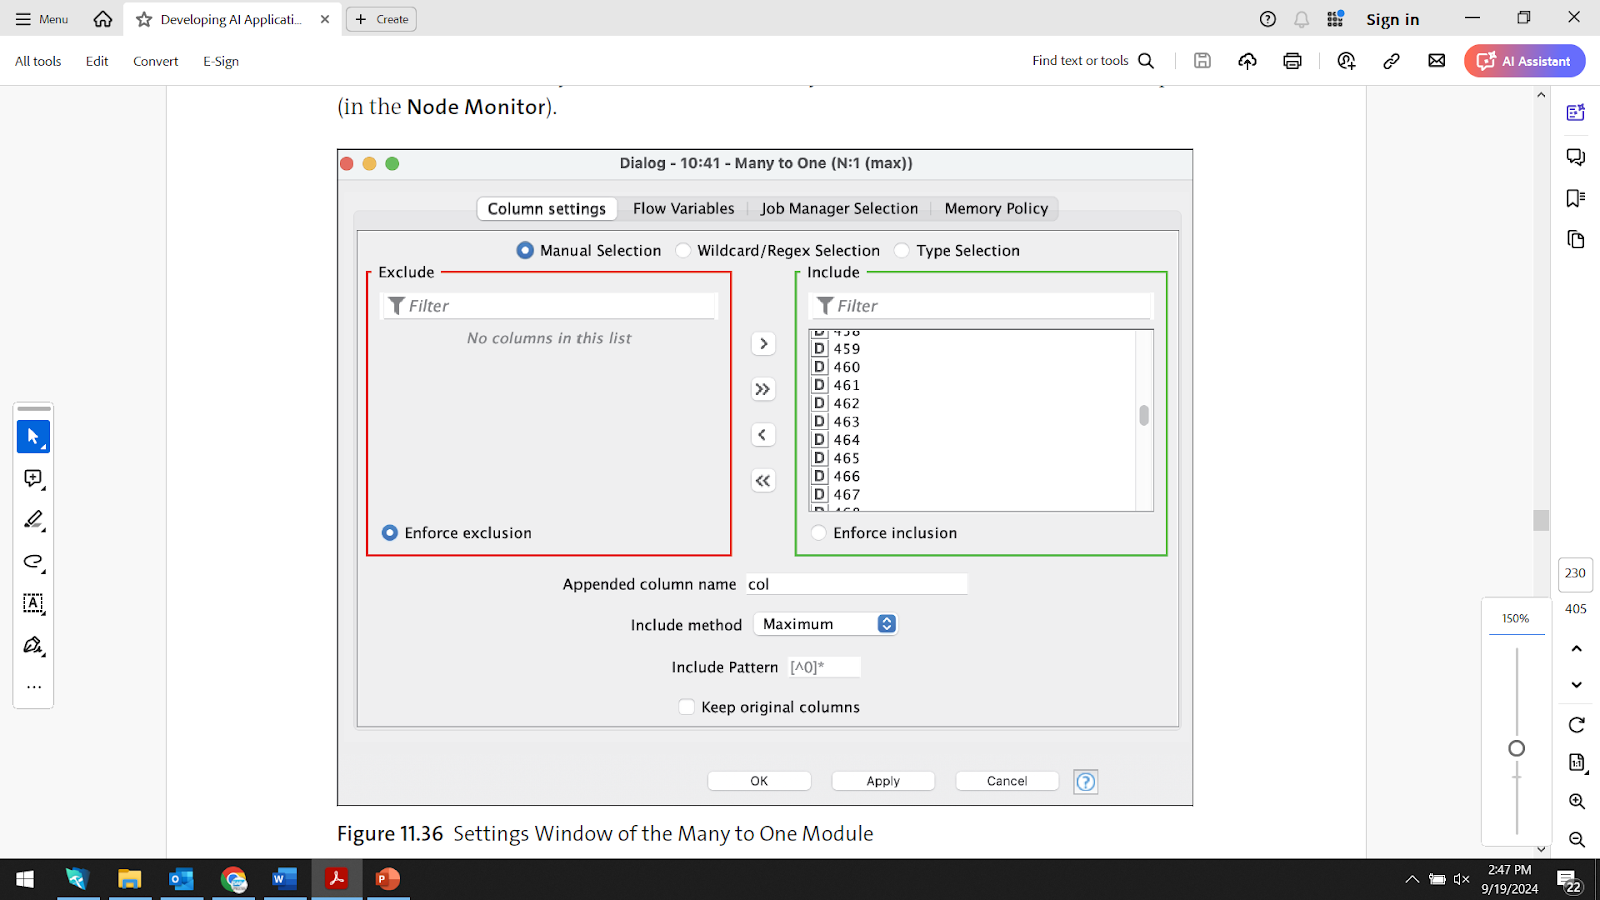
Settings Window of the Many to One Module
Although a number is displayed, the data type is string, so it must be transformed using Column Auto Type Cast. With this module, only the column needs to be selected because the remaining settings are determined automatically. The number 850 is output at the output of this module, but this time with the correct data type. We don’t know which class is behind this number, but we can continue using it.
The allocation table is loaded using CSV Reader. Note that this file doesn’t contain any column headings. This table contains the assignment of numerical values to class descriptions. The Joiner module forms the intersection of the table with the “col” column, a row (the value 850), and the assignment table (“Column0” column). In the Node Monitor of this last module, you’ll finally see the important information as to which class the object in the image belongs to: “teddy, teddy bear”.
Image Classification Using Python Node
The structure of the program is very clear. The image is loaded and resized, and the data is converted so that it can be processed in the Python Script. You can view the loaded image using Image Viewer (see the figure below).
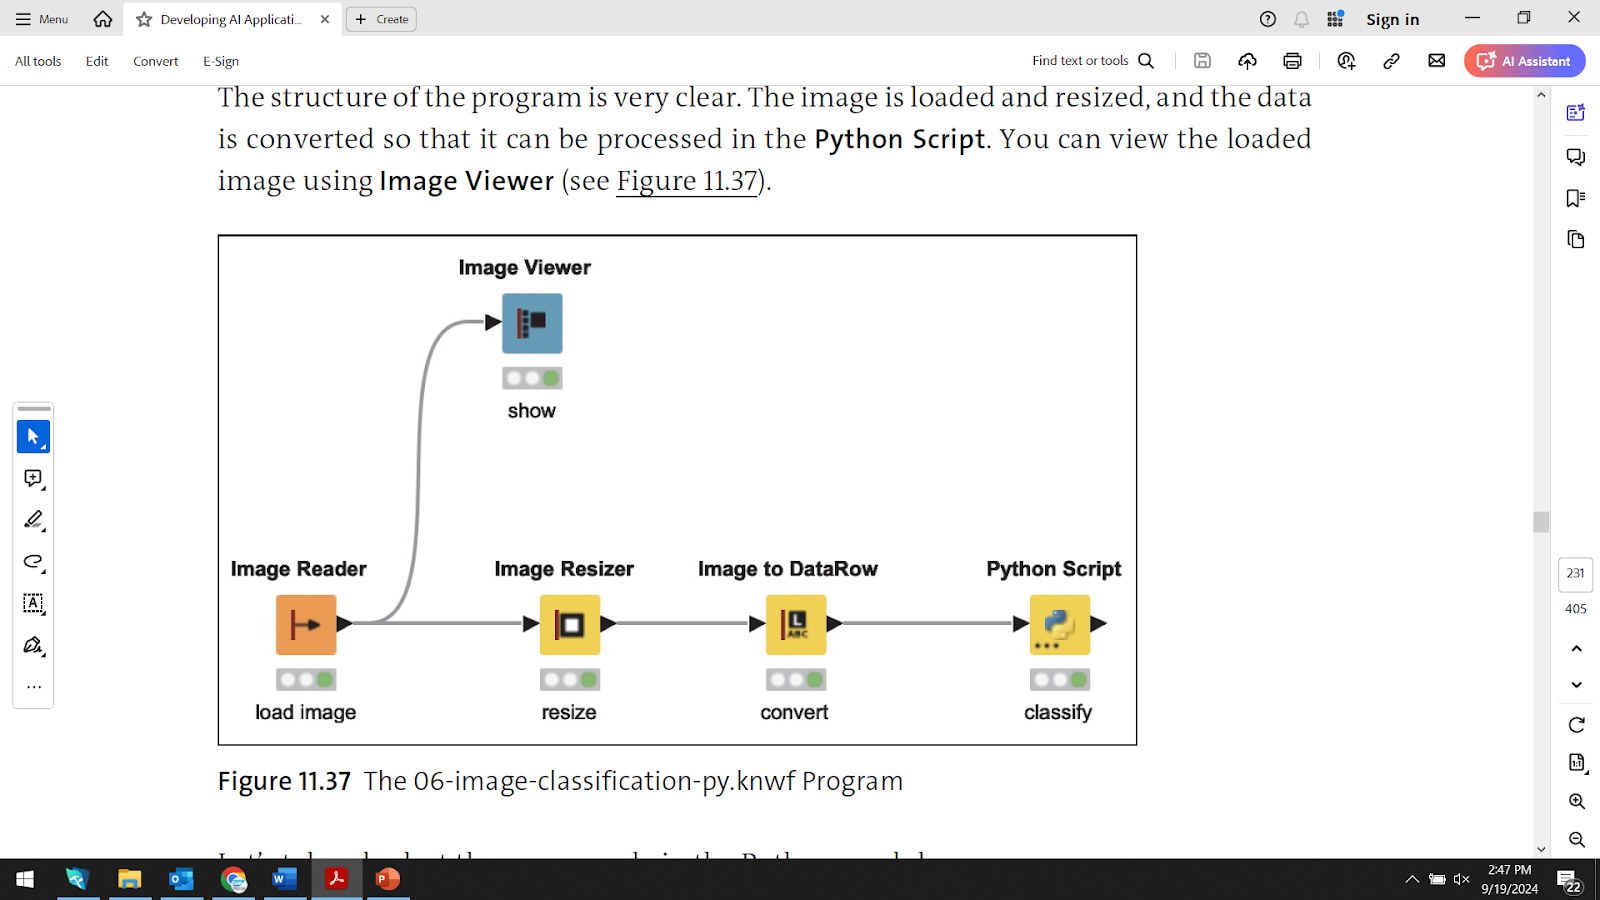
The 06-image-classification-py.knwf Program
Let’s take a look at the source code in the Python module.
import knime.scripting.io as knio
import tensorflow as tf
import pandas as pd
import numpy as np
from tensorflow.keras.applications import vgg19
# Read data
pic = knio.input_tables[0].to_pandas()
# Instantiate model
model = vgg19.VGG19()
# Adapt data to the model
img = np.array(pic['Image'][0])
img = img.reshape(1, 224, 224, 3)
img = tf.keras.applications.vgg19.preprocess_input(img)
# top ten
pred = model.predict(img)
top_ten = vgg19.decode_predictions(pred, top=10)
# Output of the result
df = pd.DataFrame(top_ten[0])
df.drop([0], axis = 1, inplace=True)
knio.output_tables[0] = knio.Table.from_pandas(df)
The image is evaluated and the result—a list of the top 10 with the probabilities for the correct classification—is output.
Conclusion
Image classification using pretrained AI models like InceptionV3 and VGG19 offers an efficient and effective way to analyze visual data. By leveraging the power of tools such as Keras and Python, you can implement these techniques with relative ease, transforming raw images into meaningful information. Whether you’re classifying common objects like teddy bears or diving into more complex datasets, these methods provide a solid foundation for advancing your AI projects.
This content of this post comes from my book Getting Started with Python from Rheinwerk Computing.
Author: Metin Karatas
Bio: Metin Karatas is an electrical and information technology engineer. He was the first person to teach AI when it was established as a subject in Bavarian schools and he’s a member of the AI curriculum commission in Bavaria. Metin also teaches programming, electrical engineering, project management, and other subjects at a technical school for vocational training. He is enthusiastic about researching cutting-edge technologies and combining theoretical understanding with practical experience.
Want to share your content on python-bloggers? click here.