How to get started using Python in Excel (First steps)
Want to share your content on python-bloggers? click here.
I’ve long advocated for Excel users to enhance their skills by learning some Python. In fact, I’m so passionate about this idea that I authored a book on how Excel users can embrace Python. However, I recognize the hesitation. Python isn’t just another application where you can simply navigate through clicks to learn; it’s a programming language that requires a specific environment for download, which can be challenging even for seasoned computer users.
Thankfully, much of Python’s complexity and inaccessibility has been alleviated with its integration into Excel. Despite this, there are still new aspects and guidelines to learn, especially for those new to Python. This post aims to demystify the initial steps of using Python in Excel, guiding users through this innovative combination.
Opt into the program
The initial step involves enrolling in the preview program. Eventually, this product will require a separate license, primarily because executing and processing Python code necessitates cloud computing resources; it must operate in the cloud.
A significant hurdle for many everyday users in starting with Python is IT restrictions on downloading software, even when it’s free. Microsoft’s solution to circumvent this problem is by embedding Python within Excel. While this approach may not be ideal, it effectively addresses these download restrictions.
Learn a bit of Python independently of Excel
To maximize the benefits of Python in Excel, I highly recommend first learning the basics of Python independently. This approach is akin to practicing driving in an empty parking lot before navigating busy streets. It reduces cognitive load, enabling you to concentrate on mastering the fundamentals and grasping the rules at a comfortable pace, without the intricacies of real-world traffic.
In a similar vein, gaining a foundational understanding of Python’s syntax and capabilities separately from Excel simplifies the learning process. It provides clarity and ease in applying this knowledge when integrating Python with Excel.
There are numerous resources available for learning basic Python, including some specifically tailored to the experiences and needs of Excel users. One such resource I personally recommend (big surprise!) is Advancing into Analytics: From Excel to Python and R by George Mount.
Adopting this approach also exposes you to various Excel automation tasks achievable with Python, which, at present, must be executed outside of Excel since the Python integration in Excel does not support them. As outlined in this article, the synergy between Python and Excel extends beyond the scope of Python within Excel:
Indeed, working with Python outside of Excel requires confronting the download and environment setup challenges mentioned earlier. To mitigate some of these complexities, especially those associated with enterprise computer systems, I recommend starting your Python practice on a personal computer. This approach allows you to familiarize yourself with the installation process and environment configuration in a more controlled and less restrictive setting.
By doing so, you can gain confidence and understanding in handling Python’s setup before potentially navigating the more complex IT policies and systems of an enterprise environment.
Understand the Python in Excel environment
Learning Python independently of Excel offers the advantage of becoming acquainted with Python packages, which are essential for enhancing Python’s capabilities, particularly in data analysis. Understanding how to install and use these packages is crucial, as they significantly amplify Python’s functionality. Key packages like pandas and seaborn are integral for data manipulation and visualization, respectively.
Most introductory Python courses or books tailored for data analysis, including Advancing into Analytics, cover these important packages. This foundational knowledge is not just theoretical; these major packages are also accessible in the Python within Excel environment, enabling you to apply your independent learning directly in Excel.
For a comprehensive list of these packages and guidance on how to access and utilize them within Excel, check out this post:
Adding a Python cell
OK, now that you’ve enrolled in Python in Excel and you’ve learned some of the basics of learning Python in Excel, let’s hit the ground running with Python in Excel.
Python in Excel uses the familiar Excel grid layout to store Python cells in. To get started, you need to earmark your desired cell as a Python cell by inserting the PY() function into that cell. For example, I’ll create a basic Hello, world object in cell B2. Hit Ctrl + Enter to execute the Python cell when finished.

Every Python in Excel cell will be prefaced with the green PY symbol to the left of the formula bar, but manually entering =PY() into the formula bar is not the only way to get here. Check out this post for some alternative ways to do it:
Adding more cells and the order of execution
Python’s ability to assign the results of operations to objects and reference or manipulate these objects later is indeed a powerful feature. It allows for a structured approach to programming, much like crafting a narrative: just as you wouldn’t assign dialogue to a character before introducing them in a story, you shouldn’t manipulate an object in Python before defining it.
When using Python in Excel, the principle remains similar, but with a key difference in the order of execution. In a typical Python script, the code is executed sequentially from top to bottom. However, in Excel’s Python environment, the execution order follows a left-to-right, then top-to-bottom pattern.
To illustrate, consider an example where I attempt to capitalize the letters in my_object in both cells A1 and C3 of an Excel spreadsheet. Due to this unique order of execution in Excel, my_object will not be recognized as a valid object in cell A1 because it hasn’t been defined yet. However, in cell C3, my_object will be recognized, assuming it was defined in a cell to the left of C3 or in any row above it.

This distinction in execution order is crucial to understand when working with Python in Excel, ensuring that your code functions as intended within the spreadsheet’s structure.
Using an Excel range as input
Chances are, you’re looking to utilize Python for tasks beyond just capitalizing strings or performing basic operations on individual cells. Fortunately, Python is versatile enough to handle this. Typically, data isn’t stored directly within a script in Python; instead, it’s imported from external sources. The range of data sources for standalone Python is extensive, encompassing everything from CSV files and websites to more unconventional sources like video or audio.
When working with Python in Excel, the environment is somewhat more restricted. Here, you’re able to connect only to specific Excel elements such as ranges, names, tables, or Power Query queries, and this is achieved through the use of the XL() function.
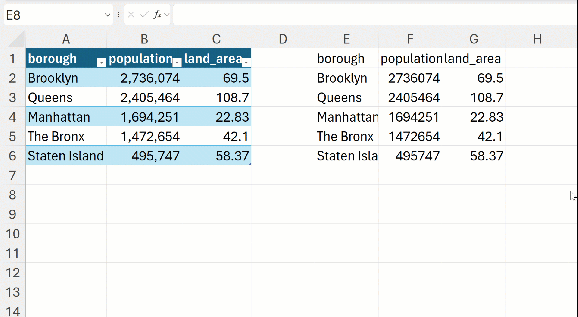
Take, for example, a small table I have which details the population and land area of New York City’s five boroughs. To utilize this data with Python in Excel, all I need to do is point my mouse at this range to select it.

The XL() function, by default, automatically sets the headers parameter to True. This is because Python in Excel typically stores data as DataFrames, which benefit from having a header row. However, Python in Excel may not always accurately determine if your dataset includes a header. Therefore, it’s important to be mindful of adjusting either your data or this parameter in your function call as needed.
You can learn more about how Python in Excel handles headers at this post:
Converting from Python object to Excel range
It can be somewhat frustrating that when you execute this function, the resulting data isn’t immediately visible. Instead, what you see is merely the object’s name in the cell. To actually understand what data is contained within this object, you have a few choices. One approach is to obtain a preview of the data, along with some additional attributes, by selecting the small menu icon located to the right of the cell.
This functionality utilizes Excel’s linked data types, allowing it to present various pertinent attributes for the given data. The most useful feature in this context is likely arrayPreview, which provides a snapshot of the data:

This method is quite useful for previewing your object in this manner, especially for small datasets. However, for larger datasets, you’ll likely need to view the entire object. To achieve this, you can convert the object into its actual Excel values.
To begin, remove the Excel preview. This can be done by clicking the small, stacked card-like icon located to the left of the formula bar. Then, switch it to display Excel values or select the number icons.

You can also complete this with the keyboard shortcut Ctrl + Alt + Shift + M.
One issue with exporting a complete Python object into Excel arises when the output spans multiple cells and this range varies. This scenario is ideally managed with dynamic arrays, which Excel employs for this task. For instance, I can reference this range using the spill operator, #:
Of course, the mere act of transferring a dataset from Excel to Python and subsequently displaying it lacks substantial utility or excitement. To explore practical scenarios where analyzing or manipulating data in Python proves more convenient than in Excel, consider the following post:
Inserting plots
Incorporating Python plots into Excel leverages some of Excel’s newer features. For instance, begin by creating a cell in Python using the following code to generate a bar plot from Python data.
Ensure you transform the cell from an ‘object’ type to actual Excel values.
Despite these steps, you might notice the Python plot appears quite small in your cell. This occurs because the image is sized to fit within the individual Excel cell. To improve visibility, right-click the cell, then navigate to Picture in Cell > Place over Cells:

For a more engaging exploration of Python’s capabilities in Excel, particularly for data visualization and constructing charts that are typically challenging to create directly in Excel, consider reviewing this post.
Conclusion: With easier access comes more infrastructure
To conclude this blog post, I’d like to highlight a paradox. Integrating Python directly into Excel not only elucidates Python’s value but also serves as a strong endorsement for Excel users to learn Python. Its accessibility reduces the sense of intimidation. However, embedding Python within Excel does create some unique challenges and additional complexity.
I hope this post has helped clarify some of these complexities and sparked your enthusiasm to delve deeper into this fascinating subject. How was your experience with your initial foray into using Python in Excel? Feel free to compare your work with my solution file provided below.
What questions do you have about getting started with Python in Excel? Let me know in the comments.
The post How to get started using Python in Excel (First steps) first appeared on Stringfest Analytics.
Want to share your content on python-bloggers? click here.